Configuring DecaSIM Insight
Config Requirements
To use the DecaSIM Insight product requires the following:
- A trained AI Shopper Model uploaded to DecaSIM
- Core Configs that identify the key fields in a Promo File.
- Templates that outline the schematic of each page and block in set of promotions.
- Assignment Scenarios to tell DecaSIM AI the order in which to optimize a set of promotions.
Uploading AI Model
All Models are trained off-line using dedicated hardware. Once trained they can be uploaded to your account via the UI in the Models section.
Before uploading a model, you must ensure that the UI.json file has been uploaded in to your config. If it is missing then contact [email protected].
Each model has three requirements:
- A model archive - zip file containing all the relevant weights and coefficients.
- A pricing file for that price zone.
- A product hierarchy for that price zone.
If you have those three files, then you are ready. To start, navigate to the Models section and click the + icon in the top right hand corner of the Models section of the dashboard.
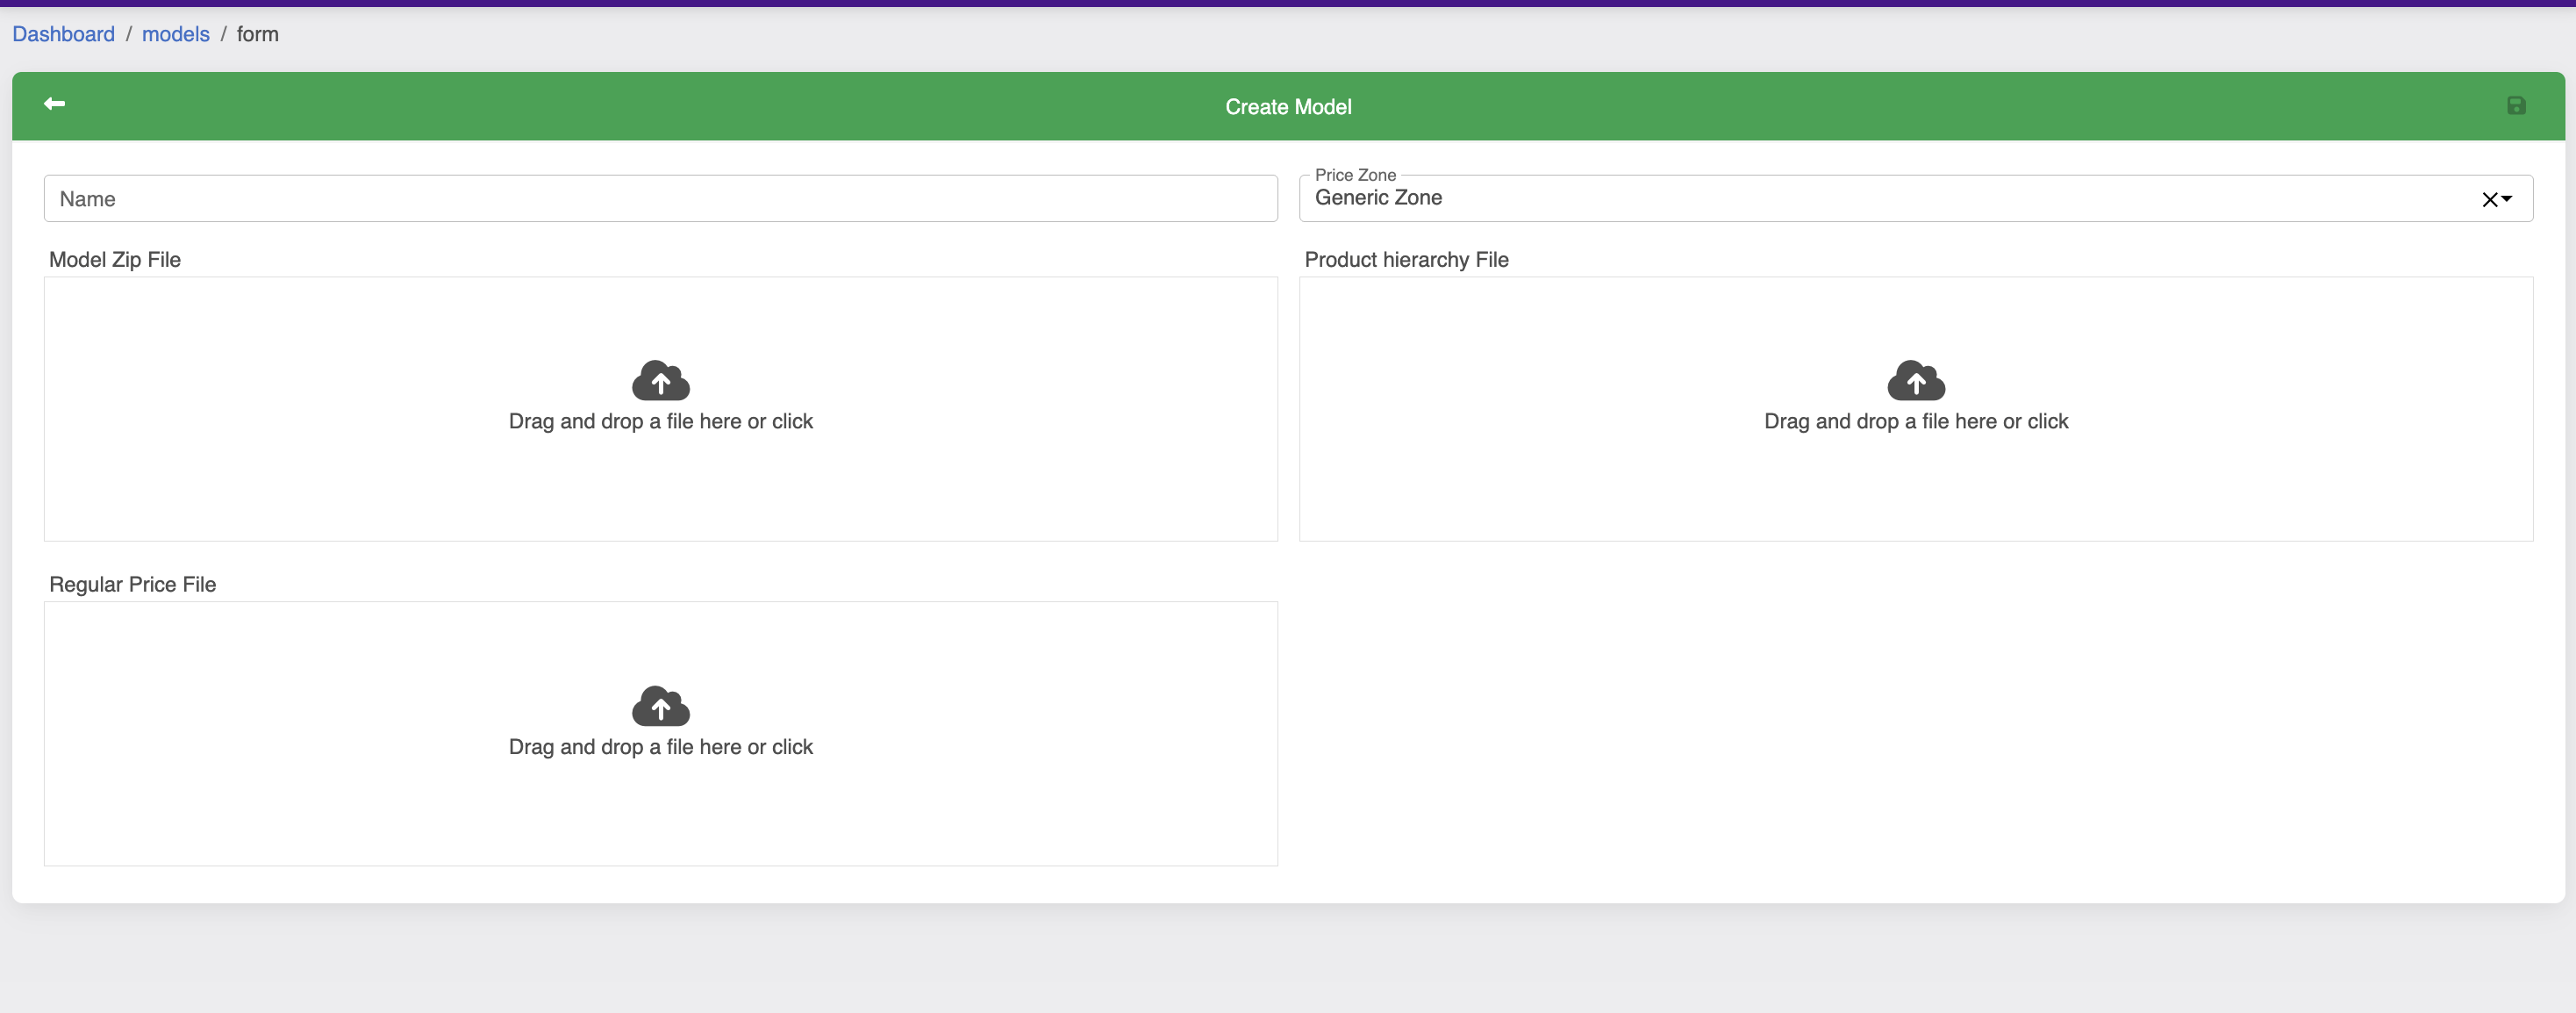
Then drag and drop the files into their relevant drop zones. Once you have completed this for all files, select a price zone in the dropdown list. and give the model a name.
If the price zone is not in the list then you will need to contact [email protected] so we can configure this. Once all files are upload click save and will be uploaded.
This table will then be displayed.

It is really important that the Price Zone in the Promo Files matches the Price Zone for the model you want to use. If they do not match then you will not be able to produce reports.
Config Required For PROMO FILES
Every retailer has a different flavor of data that constitutes a promotion. DecaSIM is designed to be flexible and adaptable. To upload a PROMO FILE, we must first configure DecaSIM to recognize the headers and fields that make up a PROMO FILE.
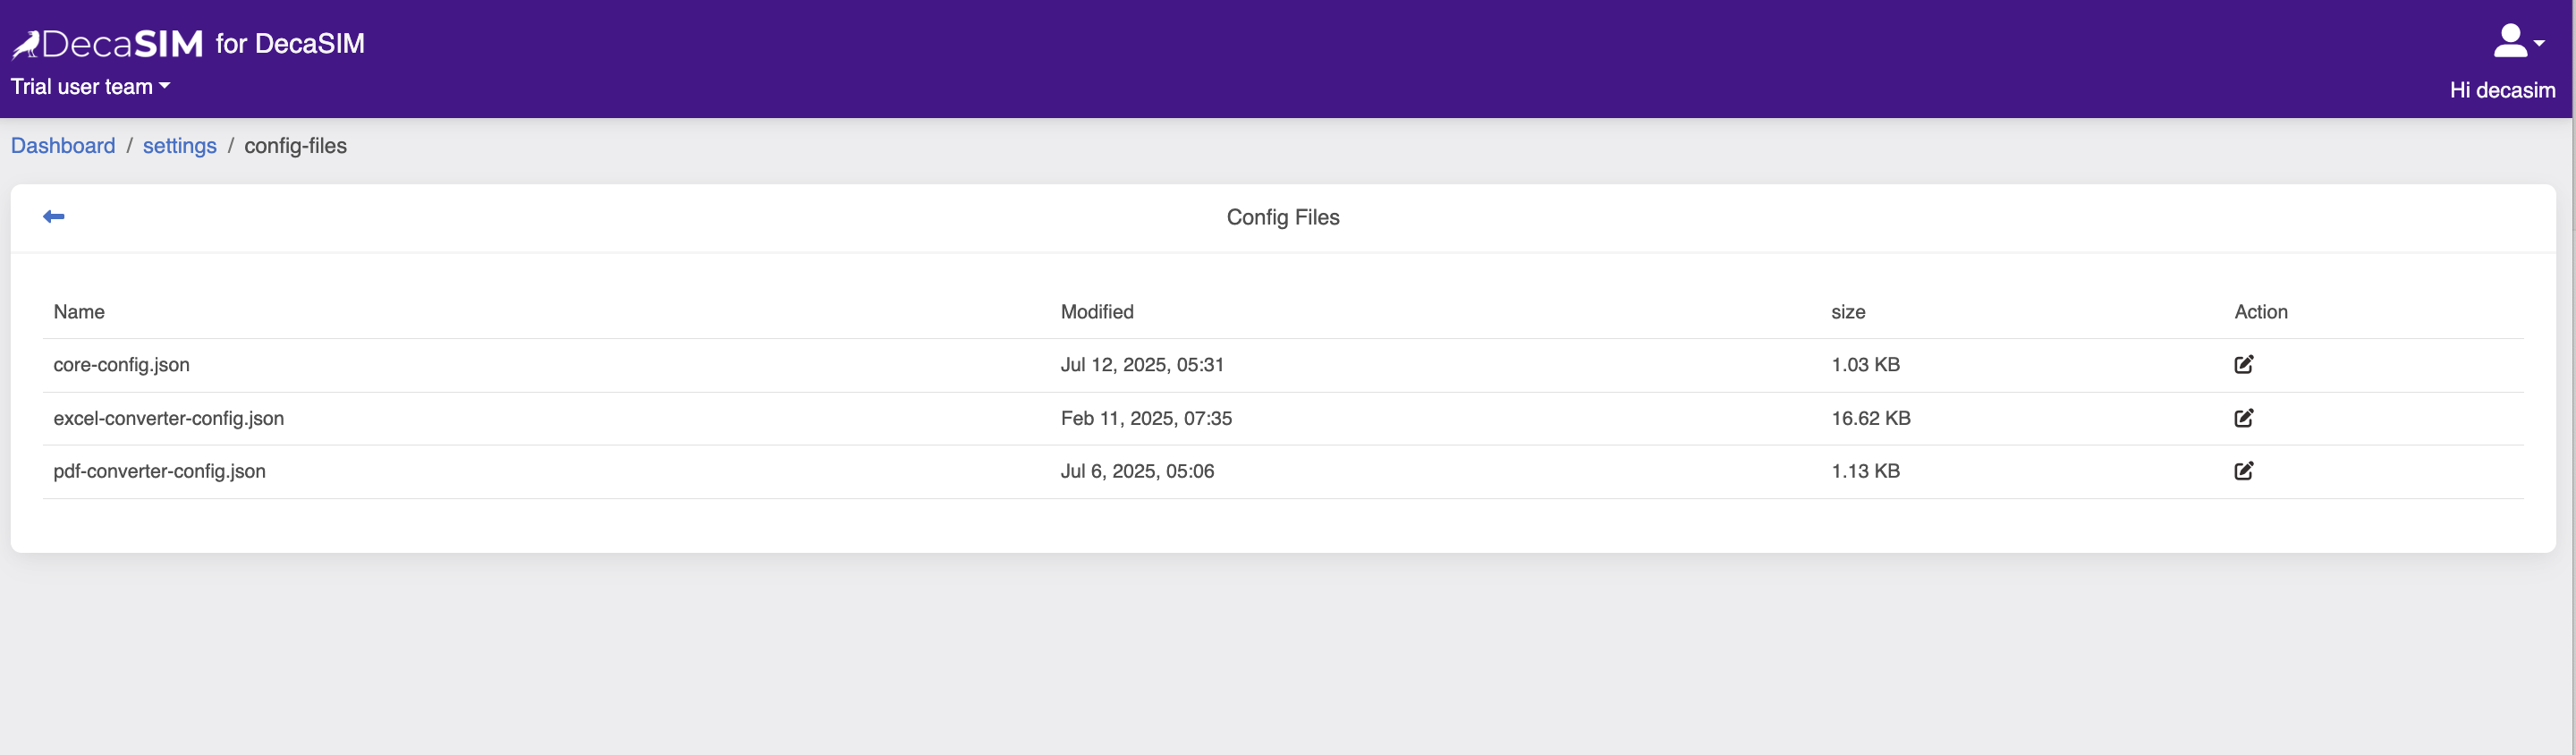
This config is updated in the core-config.json file that is found in Dashboard / Settings / Configs
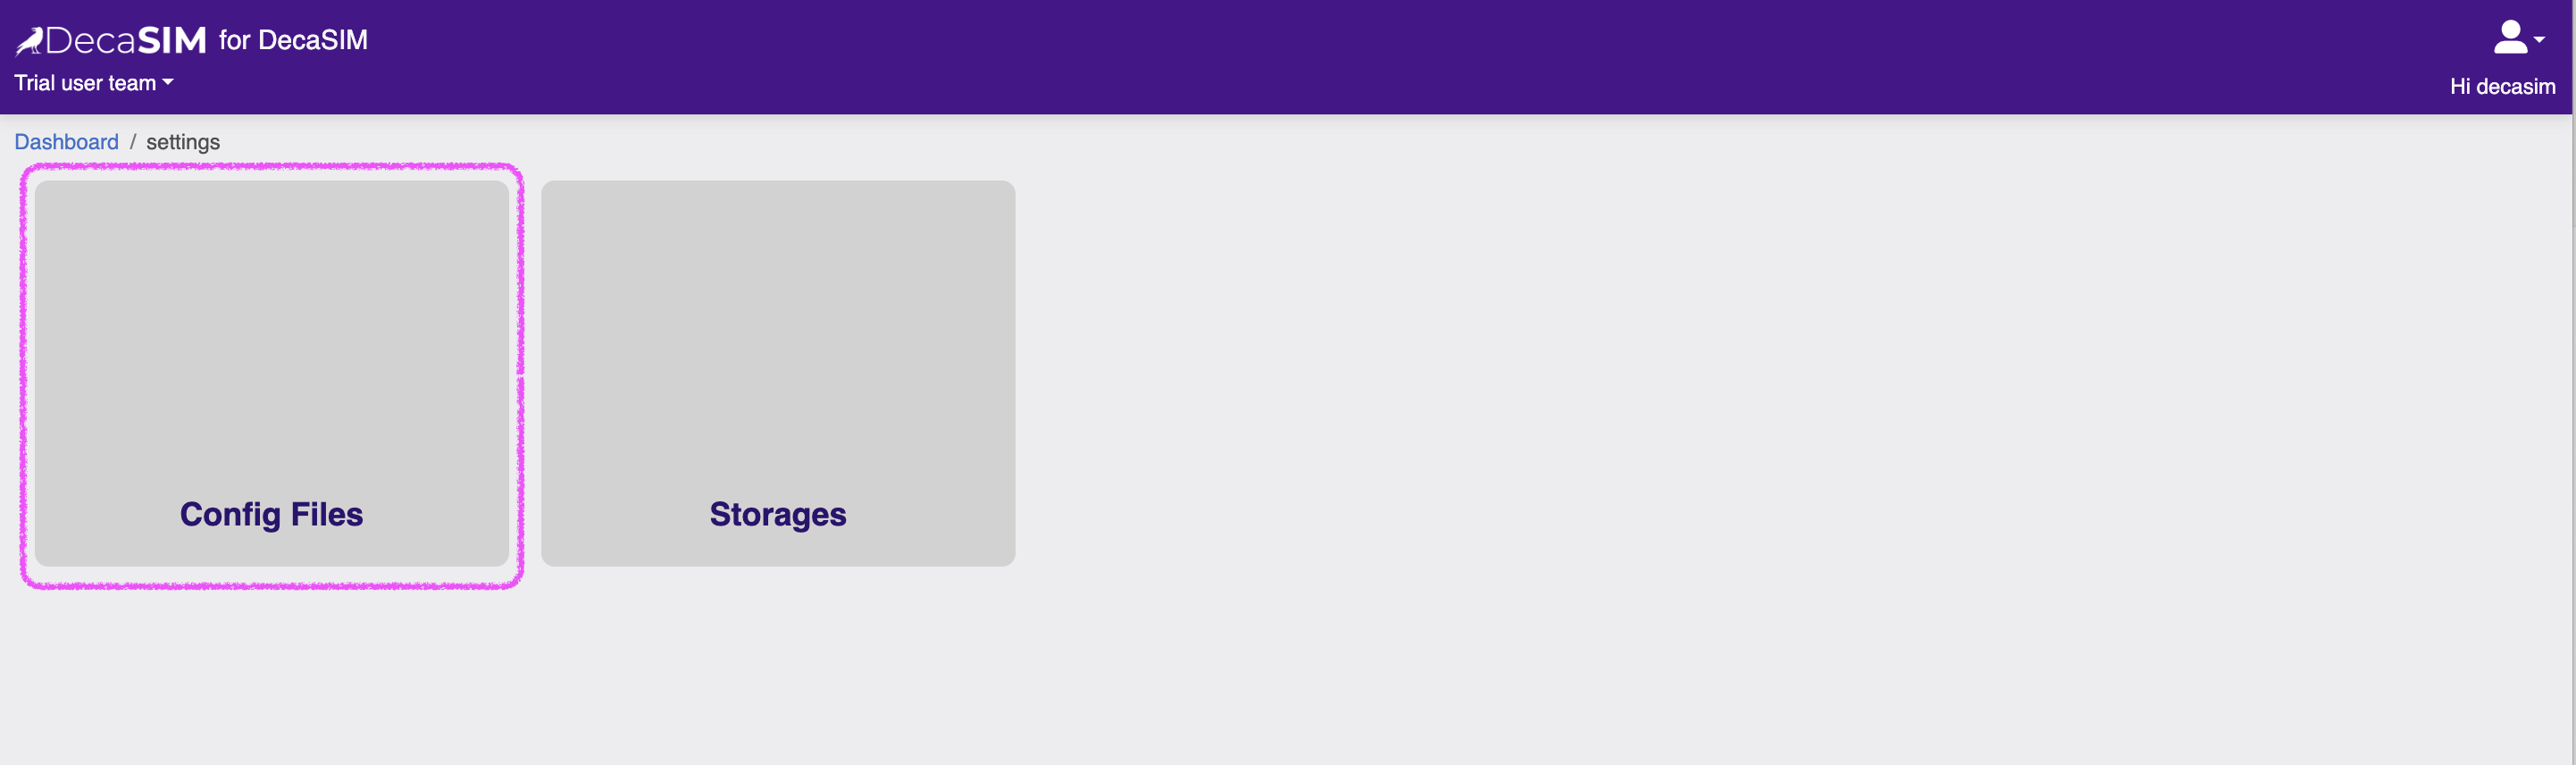
Customer Settings
The core-config.json file found here from the SETTINGS icon on the dashboard.
Then click CONFIG FILES
Click EDIT icon on the right hand side of the core-configs.json file row
Now you can mouse-over the red text to edit the values. After changing a value you will need to save the file (icon in top-right) - we are working on allowing multiple edits and one save but for now we need to do this the labor-intensive way.
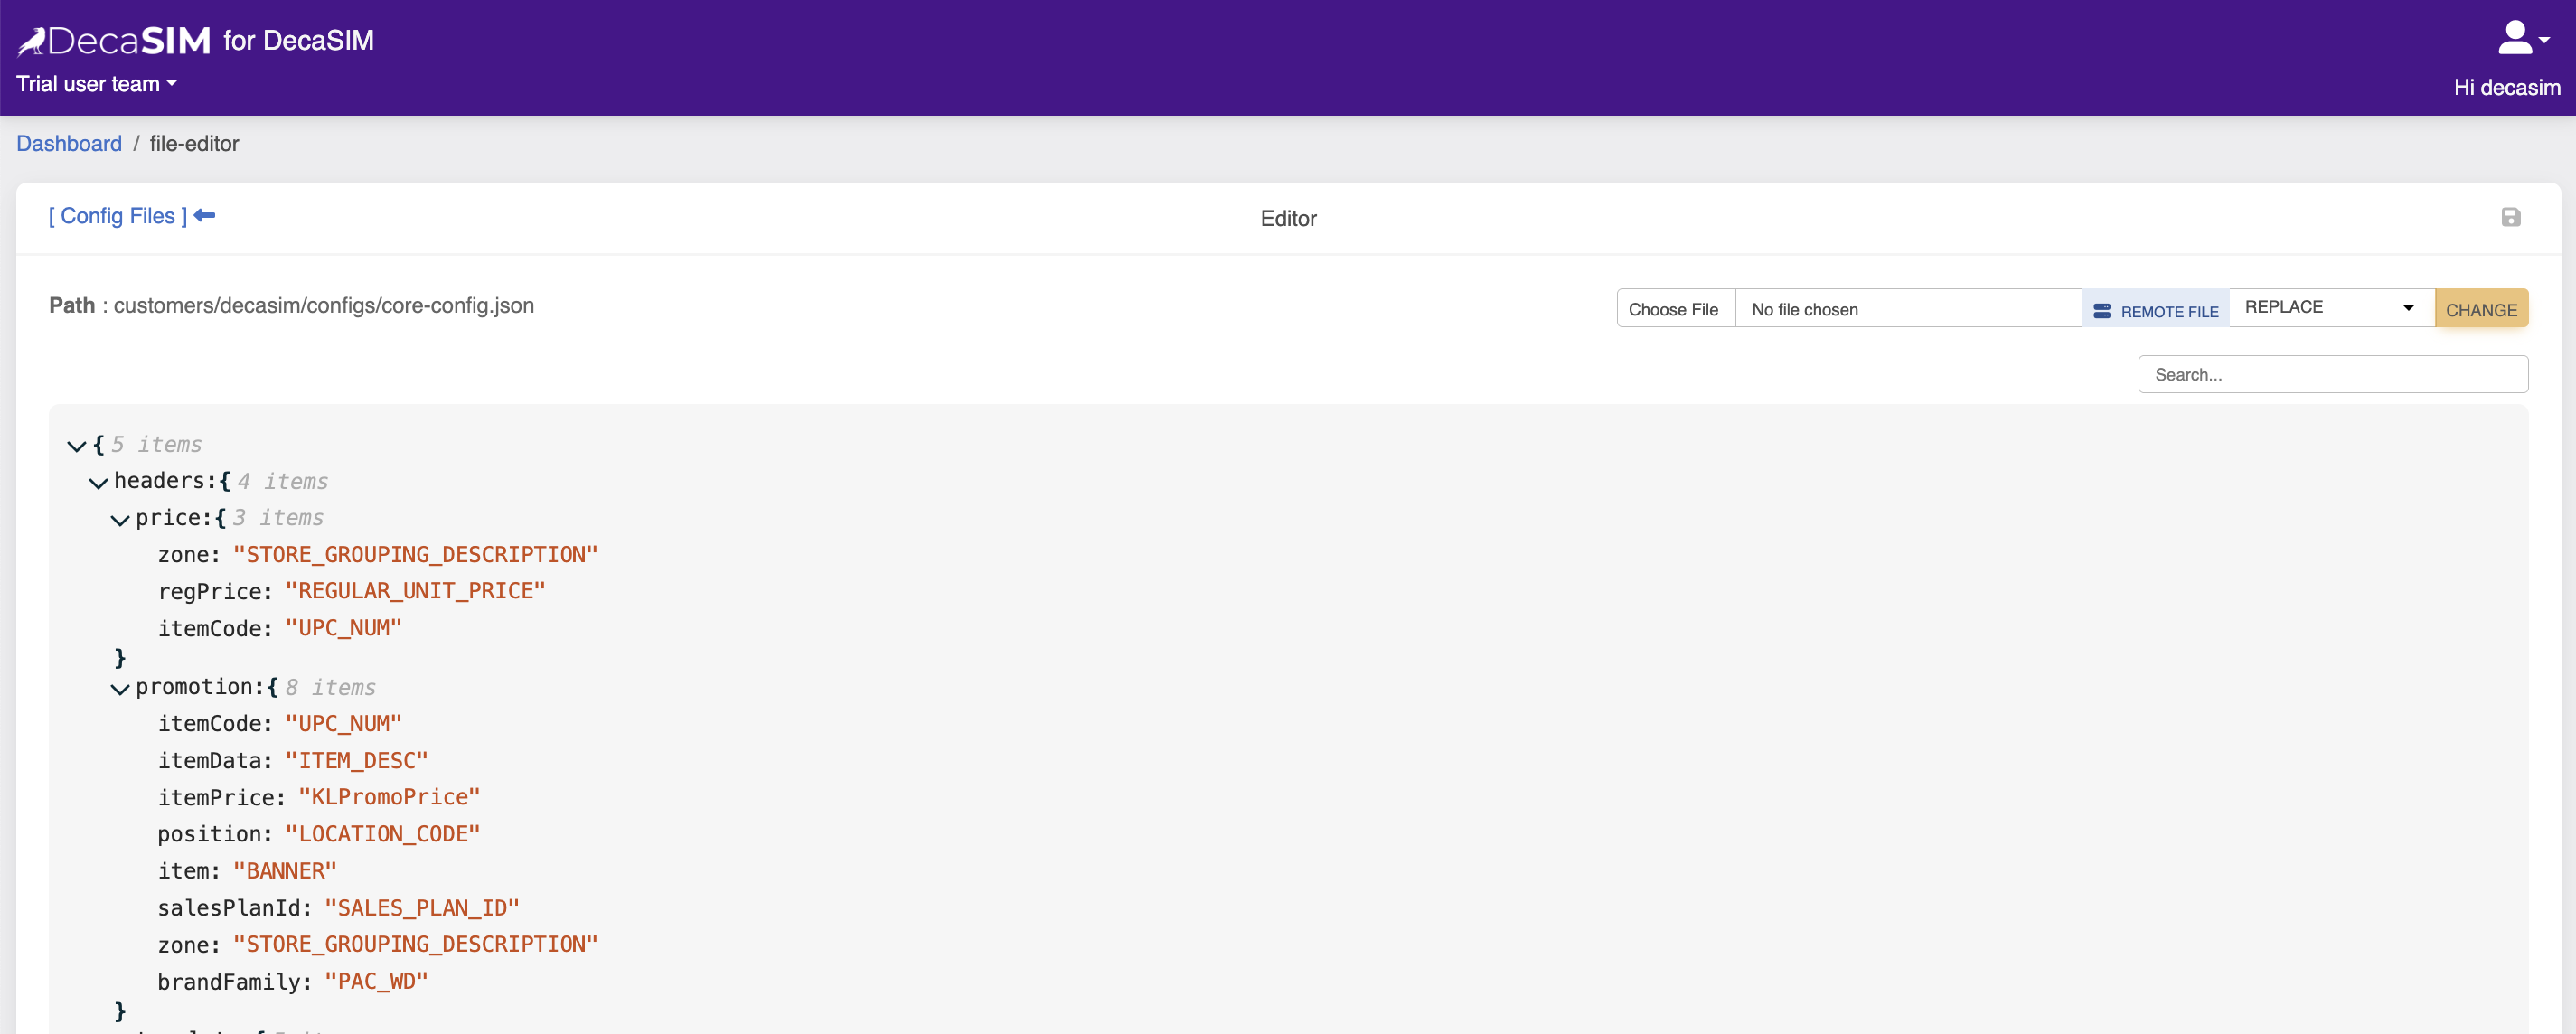
When you mouse over one green and one blue icons appear. One is to copy the value and the other to edit the value manually.
Below is a description of each field.
{
"itemCode": "universal product code number",
"itemData": "item_description",
"itemPrice": "promo_price",
"position":  "ad_placement_position",
"item":  "other_item_meta_data",
"salesPlanId":  "unique_promo_key",
"zone":  "price_zone_field_name",
"brandFamily": "brand_family_field_name"
}